The vital
first step.
Proper subfloor preparation is vital for a flawless and durable flooring installation. Key steps include moisture and pH testing, surface cleaning, leveling, repairing imperfections, and installing the right underlayment. Thorough preparation ensures proper adhesion and long-term performance of the flooring. Skipping this step can lead to serious issues like flooring failure, moisture damage, and higher maintenance costs.

Durable
Flooring
Importance of subfloor preperations.
Preventing Future Damage
Proper subfloor preparation prevents issues like buckling, warping, and uneven wear. Unchecked moisture and pH levels can damage the adhesive and flooring, resulting in premature failure.
Versatile Application
A well-prepared subfloor ensures that the finished flooring is durable and lasts its lifespan. Flooring installed over an uneven or moisture-laden subfloor can quickly develop issues like gaps, cracks, or loosening over time.
Maximizing Adhesion
In the case of flooring types that require adhesives (e.g., vinyl, carpet, or tile), subfloor preparation is vital to ensure strong adhesion. Poor adhesion can lead to flooring failure, particularly in high-traffic commercial spaces.
Smooth Surface for Installation
Subfloor imperfections, like cracks or bumps, can cause an uneven appearance and discomfort in thin flooring materials like vinyl or laminate.
Optimizing Sound and Thermal
The right underlayment improves sound and thermal insulation, which is crucial in commercial spaces, apartments, and multi-story buildings.
Key Components of Subfloor Preparation
Moisture Testing
Moisture testing is essential to ensure that the subfloor is dry enough to support the new flooring, especially for materials like vinyl, laminate, hardwood, and tile that can be sensitive to moisture. Excess moisture in the subfloor can lead to issues like warping, swelling, mold growth, and adhesive failure.
Types of Moisture Tests:
- Calcium Chloride Test: Measures the moisture vapor emission rate (MVER) from the subfloor over a specific period. A moisture barrier may be needed if the MVER exceeds acceptable limits.
- Relative Humidity (RH) Testing: Involves drilling into the subfloor to measure the internal moisture levels. This is particularly useful for concrete subfloors.
- Electronic Moisture Meters: Used to measure the moisture content of wood subfloors and other porous materials.
Concrete Subfloors
Concrete is porous and can absorb moisture from the ground. Testing ensures that any excess moisture is addressed before installing flooring materials.
Wood Subfloors
Wood can swell and warp when exposed to moisture. It’s crucial to ensure that the wood’s moisture content is within the acceptable range (typically between 6-12%) before proceeding with installation.
pH Testing
pH testing is commonly used for concrete subfloors, as high pH levels can negatively affect adhesives and the performance of flooring materials like vinyl and carpet. The alkalinity of the concrete must be tested to determine if it falls within the acceptable range for the adhesive being used.
How pH Testing Works:
A pH test kit is applied to a section of the concrete to measure the alkalinity. Most flooring adhesives work best when the pH of the concrete is between 7 and 9. If the pH level is too high, the concrete may need to be treated with a primer or moisture barrier to neutralize the alkalinity.
Subfloor Cleaning and Repair
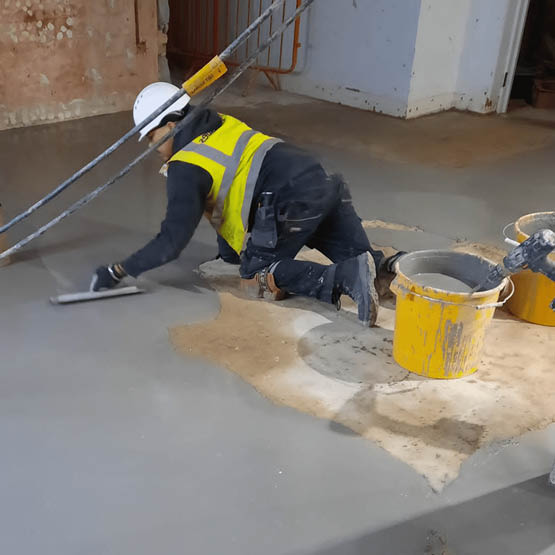
The subfloor must be clean, dry, and smooth before the installation of any flooring material. This includes removing dust, dirt, oils, wax, adhesives, and any other contaminants that could interfere with adhesion or cause unevenness. Cracks, holes, or low spots in the subfloor should be repaired with a leveling compound or filler to ensure a flat and even surface. Debris or imperfections in the subfloor can cause visible bumps or seams, especially with materials like vinyl or laminate, which are less forgiving of uneven surfaces.
Surface Leveling
A level subfloor is critical for ensuring that the flooring material lies flat and securely. Uneven surfaces can lead to premature wear, squeaking, and an uncomfortable feel underfoot. For minor unevenness, a self-leveling compound can be applied to smooth out the subfloor. For larger imperfections, grinding or sanding may be necessary. A spirit level or laser level can be used to check the flatness of the subfloor. Generally, a subfloor should not have variations greater than 3/16″ over a 10-foot span, though this requirement may vary depending on the flooring type.
Underlayment Installation
Underlayment serves as an additional layer between the subfloor and the finished flooring material. Its purpose is to improve comfort, reduce noise, provide moisture protection, and create a smooth surface for flooring installation.
Types of Moisture Tests:
- Foam Underlayment: Common for laminate and vinyl plank floors, foam underlayment adds a cushion underfoot and reduces noise. Some types have built-in moisture barriers to protect against moisture seeping from the subfloor.
- Cork Underlayment: Known for its sound-absorbing properties, cork is a popular choice in multi-level buildings where noise reduction is important. It can also help with minor subfloor imperfections.
- Rubber Underlayment: This dense material provides excellent sound insulation and is used for both hard and soft flooring types, including vinyl, laminate, and tile.
- Felt Underlayment: Often used with hardwood and engineered wood floors, felt provides cushion, moisture resistance, and sound absorption.
- Moisture-Barrier Underlayment: For concrete subfloors, a moisture barrier underlayment is essential to prevent moisture from seeping into the flooring material.
Priming
Some subfloors, especially those with high porosity, may require a primer before flooring installation. Priming helps seal the subfloor and improves the adhesion of flooring adhesives, particularly for vinyl, tile, or carpet installations. It also helps in binding dust particles and creating a more stable surface for the flooring materials.
Popular brands.


